 Save
Save The first time I tried assembling these no-bake strawberry cheesecake jars, I could never have predicted just how much the zesty, creamy aroma would fill my kitchen. The sound of crushed biscuits tumbling into a bowl and the gentle swirl of whipped cream made the process oddly soothing, even on a busy afternoon. There was nothing formal about it—I simply wanted something fresh, sweet, and playful without turning on the oven. I distinctly remember the contrast of cool glass jars pitted against the warmth of my hands as I packed each layer. It's a dessert that's as much about assembling as it is about enjoying the moments in between.
When my friend Mia stopped by during a sunny April evening, these jars were my impromptu solution for dessert. She laughed at my ‘assembly line’ on the counter, and we both ended up spooning leftover compote straight from the pot while waiting for the jars to chill. The effortlessness of this recipe made it perfect for casual moments, and the bright color in each jar brought a little cheer to our kitchen.
Ingredients
- Graham crackers or digestive biscuits: Choosing a biscuit with a crunchy snap gives your base the right texture and a buttery taste—crush them finely for a compact layer.
- Unsalted butter: Melted butter binds the crumbs together and a gentle melting prevents burnt flavors.
- Cream cheese: Softening it before mixing guarantees a silky cheesecake blend and less lumps.
- Whipping cream: Using cold cream lets it whip up fluffy and light—don’t skip chilling it.
- Powdered sugar: This sweetener dissolves smoothly and avoids gritty bites; sift before mixing for best results.
- Vanilla extract: Just a teaspoon brings warmth and rounds out the cheesecake flavor.
- Lemon zest: The zest lifts everything, so a fresh, unwaxed lemon works best—scrape gently to avoid bitterness.
- Fresh strawberries: Ripe, in-season berries mean a more vibrant, jammy compote.
- Sugar: Just a touch sweetens the fruit—tweak to taste if your strawberries are particularly tart.
- Lemon juice: This brightens the compote and helps strawberries break down faster.
- Whole strawberries & mint: A final garnish adds a little elegance and a hint of freshness—mint is optional but makes jars instantly inviting.
Tired of Takeout? 🥡
Get 10 meals you can make faster than delivery arrives. Seriously.
One email. No spam. Unsubscribe anytime.
Instructions
- Layer the base:
- Start by blending biscuit crumbs and melted butter until it feels like damp sand in your fingers. Spoon this mixture into the jars and press gently to anchor the base without overpacking.
- Whip up the cheesecake:
- Mix cream cheese, sugar, vanilla, and lemon zest until it's creamy—listen for the mixer’s hum as you go. Whip the cream just until soft peaks form, then fold it gently in to keep things light.
- Assemble cheesecake layer:
- Divide the cheesecake mixture among the jars, smoothing the surface with a spoon. Pop the jars in the fridge so the layers firm up and meld flavors together.
- Make strawberry compote:
- Combine chopped strawberries, sugar, and lemon juice in a saucepan; let them simmer as juices bubble and aromas bloom. Stir occasionally and cook until the sauce thickens, then let it cool completely.
- Layer the compote:
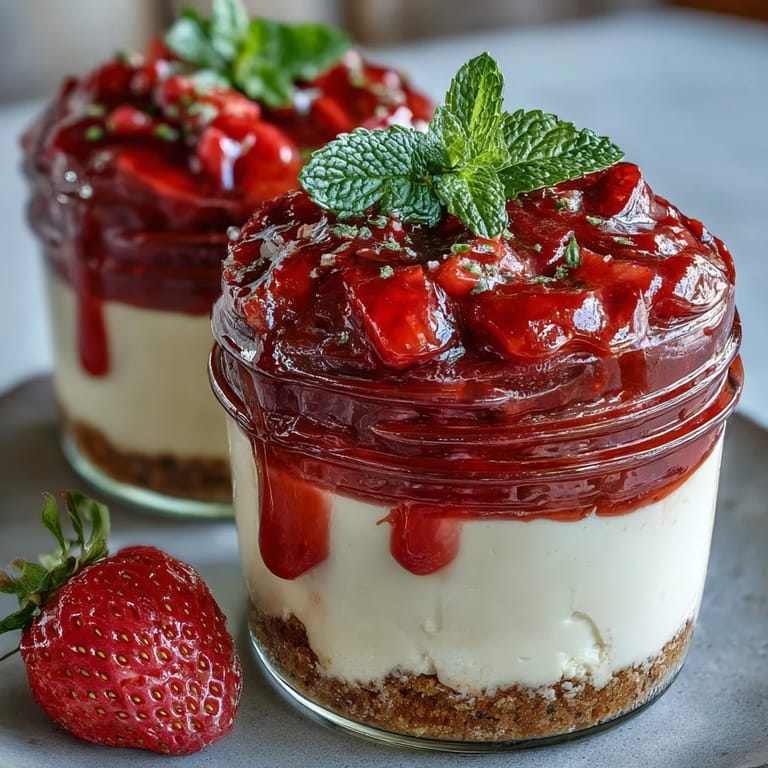
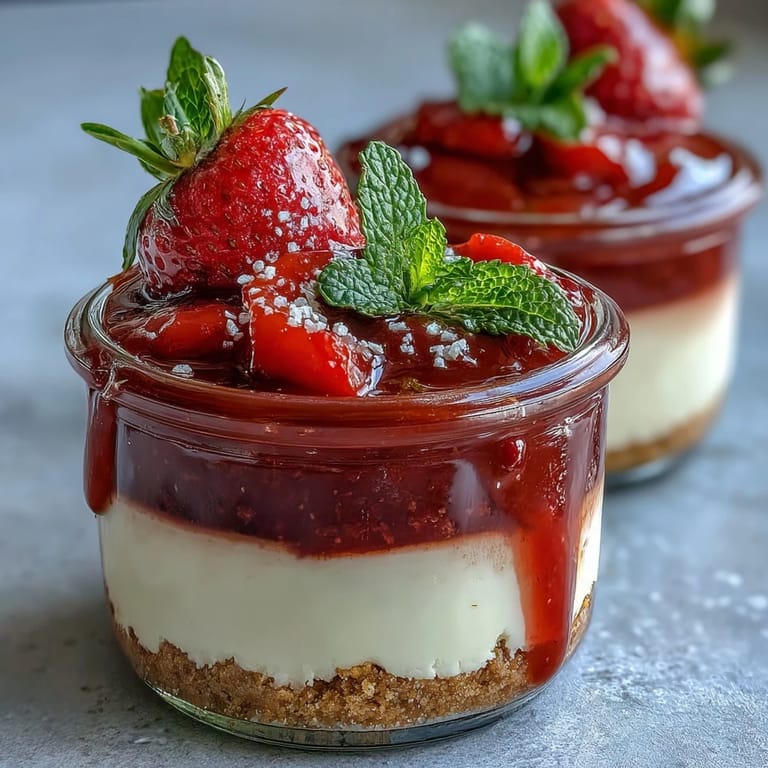
- Once jars are chilled, spread the cooled compote on the cheesecake layer—watch the red swirl over white. Each jar gets a dollop, bright and glossy.
- Garnish and serve:
- Top each jar with a whole strawberry and a mint leaf if you like. Serve chilled—every spoonful is fresh spring in a jar.
 Save
Save One evening, I watched my niece gleefully spoon out her cheesecake, leaving a neat layer of biscuit at the bottom and a strawberry compote smile across her face. It was clear these jars bring out a little joy and curiosity with each layered bite, turning dessert into a playful experience rather than just a sweet treat.
Jars: The Perfect Dessert Vessel
I’ve found small glass jars to be a game changer for portioning and presentation; they keep layers intact and make it easy to transport for picnics or parties. There's something fun about seeing every level through the glass—plus, there's less mess and more elegance than using a typical pan.
Strawberry Compote Secrets
The compote’s fragrance fills the kitchen with anticipation; cooking it just long enough to thicken gives you that jammy texture without becoming syrupy. Tossing in a few extra berries at the end for chunkiness is my trick to keep things visually interesting and juicy.
Making Ahead and Flavor Tweaks
These jars actually taste even better the next day as the flavors meld and layers set perfectly. I often swap raspberries or blueberries in when strawberries aren't at their peak—each brings its own tart-sweet personality to the compote.
- Prepare jars up to a day ahead for optimal flavor.
- Experiment with biscuit varieties for a new texture.
- Always zest the lemon right before using for the freshest fragrance.
 Save
Save Let your creativity shine with garnish and compote swaps—these cheesecake jars welcome improvisation. Above all, enjoy the playful process and the bright, layered result!
Recipe FAQ
- → Can I use different berries for the compote?
Yes, raspberries or blueberries work well as substitutes for strawberries, offering varied flavors and colors.
- → How far in advance can these jars be prepared?
You can prepare the jars up to 24 hours ahead for enhanced flavor and convenience.
- → Is it possible to make this dessert gluten-free?
Absolutely! Use gluten-free biscuits for the base and check all other ingredient labels for gluten content.
- → What tools are needed for this dessert?
You'll need small glass jars, mixing bowls, a hand or stand mixer, a saucepan, and spatula or spoons.
- → How long should the jars chill before serving?
Chill the filled jars for at least 2 hours to allow the cheesecake layer to set properly.
- → Can I prepare the dessert without a mixer?
A hand whisk can be used, but a mixer yields a smoother, quicker result for the cheesecake layer.