 Save
Save My neighbor Janet brought a platter of these to our block party last summer, and I watched them disappear faster than the ice melted in anyone's drink. She caught me eyeing them and laughed, saying they looked fancier than they actually were, which made me determined to master the technique myself. The satisfying crack when you bite into that glossy candy shell paired with the tart apple underneath became my new party obsession. Now I make them whenever I need something that feels special but won't have me stuck in the kitchen all day.
The first batch I made went directly to my daughter's school potluck, and I held my breath wondering if they'd even get touched. Instead, the teacher asked for the recipe, and suddenly I was that person known for bringing the fancy-looking candy apples to every event. It's funny how something so simple can become your signature move.
Ingredients
- 2 large crisp apples (Granny Smith or Fuji): The tartness cuts through the sweetness beautifully, and their firm texture holds up to hot candy without getting mealy.
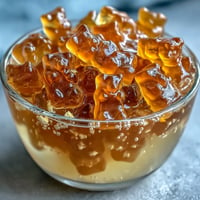
- 1 cup granulated sugar: This is your base for that hard candy shell, so don't skimp on quality or substitute with brown sugar.
- 1/3 cup light corn syrup: This prevents crystallization and gives you that glossy, professional-looking finish you're after.
- 1/4 cup water: Just enough to dissolve the sugar and get the mixture to the right temperature.
- 1/4 teaspoon red food coloring: A little goes a long way, and gel coloring gives deeper color than liquid if you have it on hand.
- Nonstick cooking spray: This prevents sticking and makes cleanup so much easier than you'd think.
- Optional toppings (nuts, chocolate chips, sprinkles): Add these while the coating is still hot and tacky, or skip them entirely for a clean look.
Tired of Takeout? 🥡
Get 10 meals you can make faster than delivery arrives. Seriously.
One email. No spam. Unsubscribe anytime.
Instructions
- Set up your station:
- Line a tray with parchment paper and give it a light spray of nonstick cooking spray so your finished bites don't cement themselves to the surface. Having everything ready before you start is non-negotiable because once that candy is at hard crack stage, you're working against the clock.
- Prepare the apples:
- Wash and completely dry your apples, then core them and cut into one-inch chunks. The drier they are, the better the candy will cling, so don't skip the paper towel patting step even though it feels tedious.
- Skewer and set aside:
- Push a toothpick into each apple chunk and arrange them on a clean plate within arm's reach of your stove. This way you're not fumbling around looking for them once the candy is ready.
- Make the candy base:
- Combine sugar, corn syrup, and water in a small saucepan and stir until the sugar dissolves. Once it comes to a boil, resist the urge to stir anymore because you'll invite crystallization and ruin the whole batch.
- Heat to hard crack stage:
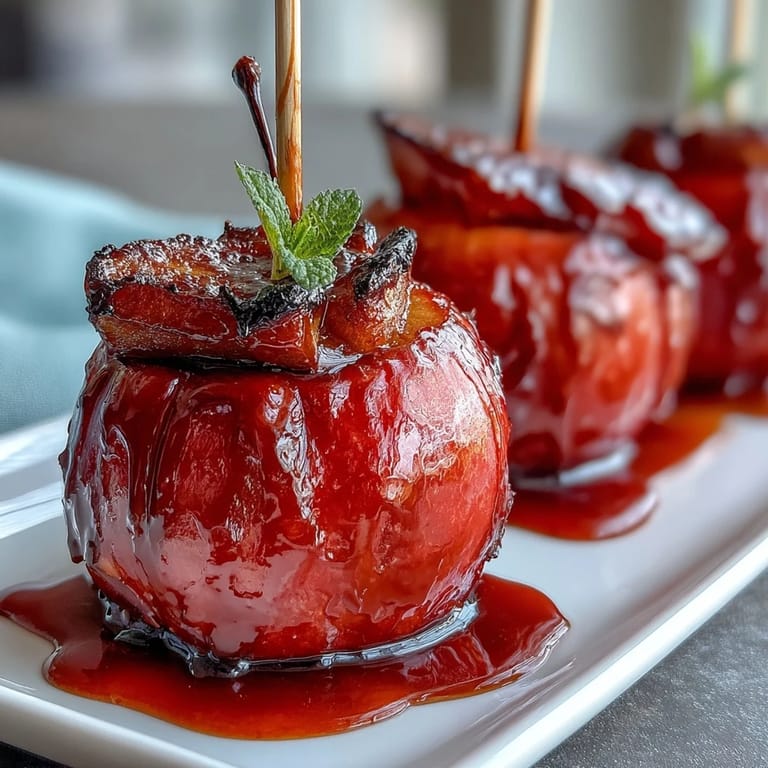
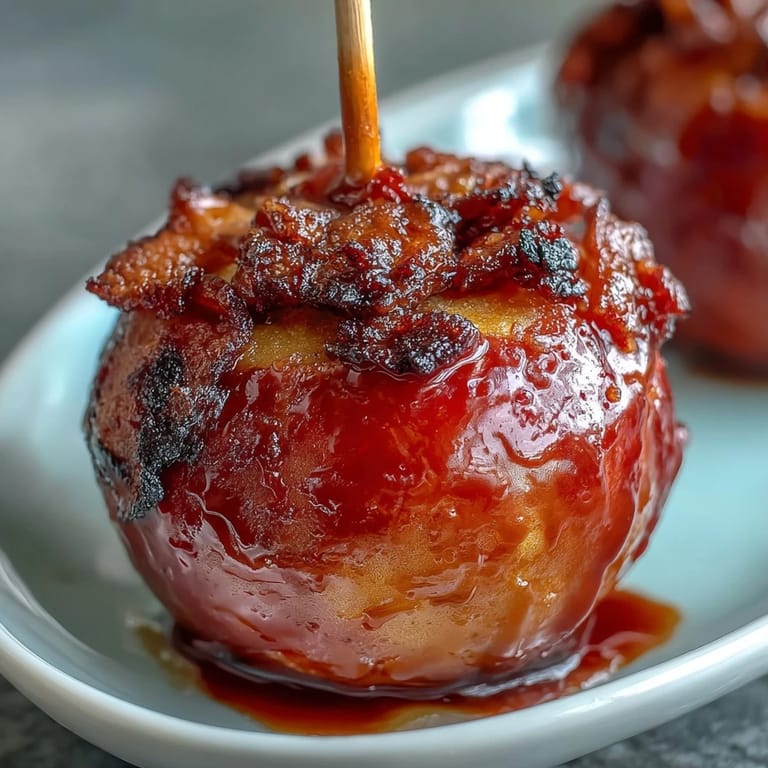
- Watch the candy thermometer like a hawk because this happens fast, usually seven to eight minutes. When it hits 300°F, you're done, and the mixture should look like liquid amber if you hold the pan up to the light.
- Add color and work quickly:
- Pull the pan off heat, stir in your red food coloring, and immediately start dipping because this stuff hardens astonishingly fast. Swirl each apple chunk in the coating to cover it completely, let the excess drip off, and place it on your prepared tray.
- Garnish if you're feeling fancy:
- If you're adding nuts, chocolate chips, or sprinkles, do it right after placing each bite on the tray while the coating is still slightly tacky. Otherwise, skip this and let them cool untouched for that sleek candy apple look.
- Cool completely:
- Leave them at room temperature until they're fully hardened before moving or stacking them. This usually takes about an hour, so patience is actually part of the recipe.
 Save
Save There was this one afternoon when my son and his best friend decided to help me make a batch, and they turned the kitchen into what looked like a candy factory explosion. They insisted on different colored coatings, different toppings, and declared themselves official taste testers. Watching them proudly present their creations to my husband that evening reminded me that these little bites are about more than just impressing people at parties.
Choosing Your Apples Wisely
I used to grab whatever apples were on sale, but I've learned that crisp, tart varieties like Granny Smith or Fuji make all the difference. Softer apples get mushy when combined with the heat and moisture, and sweeter varieties get lost under all that candy coating. The tartness also keeps these from being cloyingly sweet, which is why people actually want to eat more than one.
The Temperature Game
A candy thermometer isn't optional here, and those cheap ones that come in multitools tend to be inaccurate. I invested in a proper thermometer after my first batch turned into sticky goo instead of a hard shell, and it was worth every penny. The hard crack stage at 300°F is where all the magic happens, and even five degrees off can change everything.
Timing and Temperature Tricks
The window between perfect candy and crystallized disaster is surprisingly narrow, so I've learned to work with calm focus rather than panic. On humid days, the candy takes longer to harden, so I sometimes pop the finished tray into an air-conditioned room if I'm in a hurry. Don't store them in the refrigerator though, because the moisture will turn your glossy shell sticky and sad.
- Have your dipping station organized before you even turn on the stove so you're not wasting precious seconds hunting for toothpicks.
- If the candy hardens in the pan before you finish dipping, very gently reheat it over low heat while stirring constantly until it's pourable again.
- These keep best in an airtight container at room temperature for about three days, though honestly they never last that long.
 Save
Save These little candy apples have a way of turning ordinary moments into something special, whether you're bringing them to a party or just treating yourself on a random Tuesday afternoon. There's something deeply satisfying about nailing that candy coating and knowing you've created something that tastes as good as it looks.