 Save
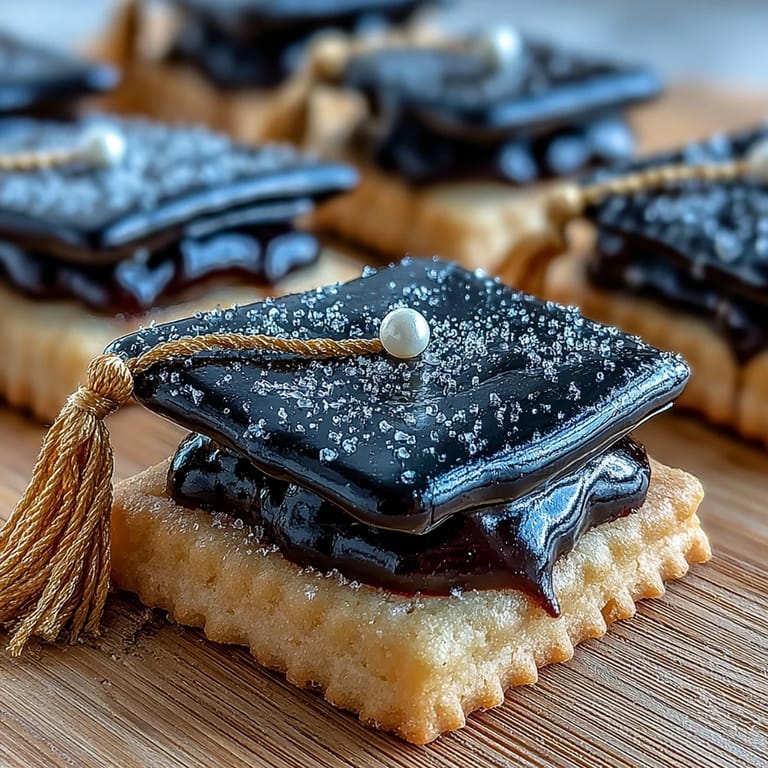
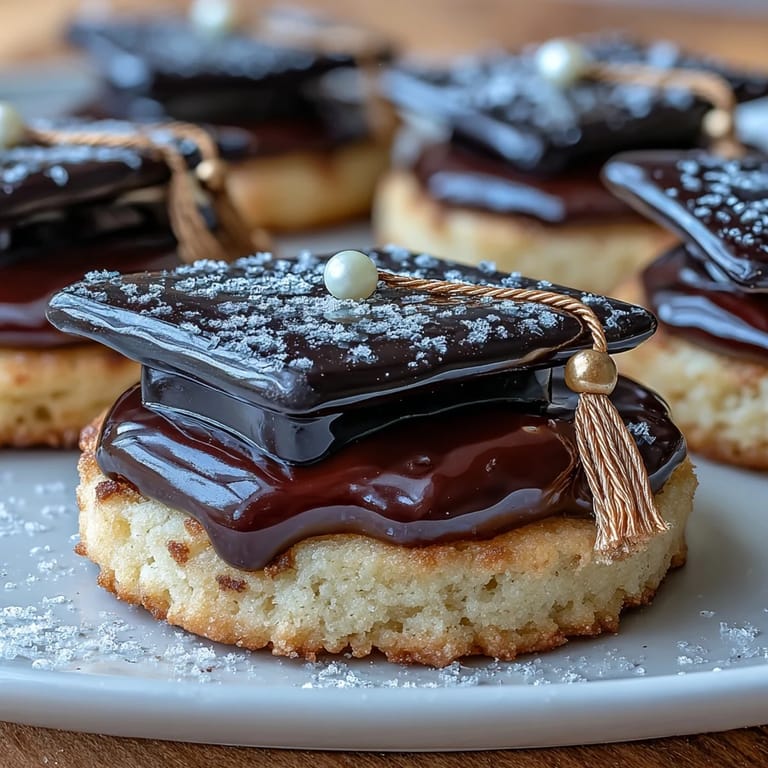
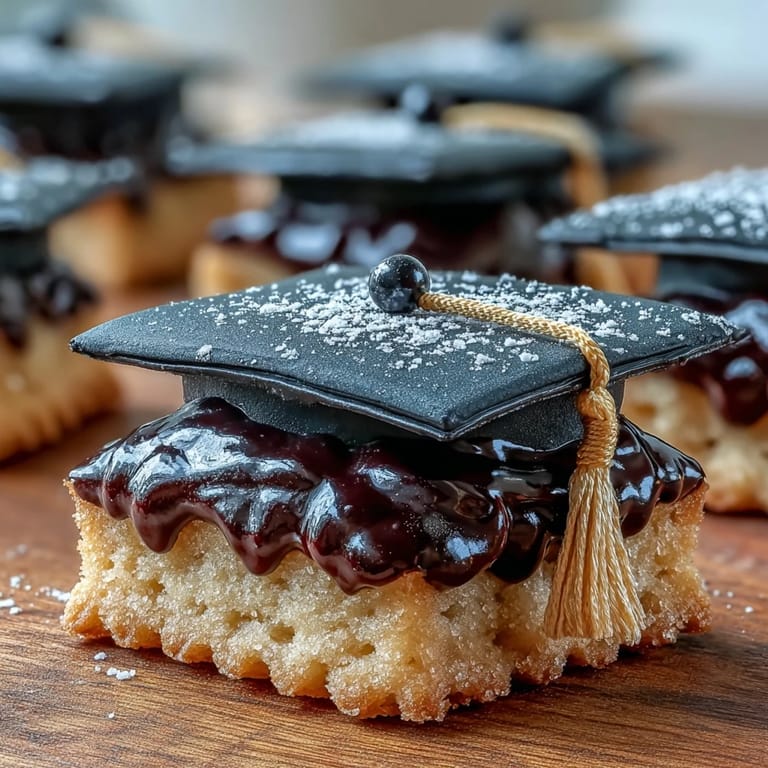
Save My sister called me three weeks before her graduation, voice shaky with excitement, asking if I could make something special for her celebration party. I found myself at the kitchen counter at midnight, scrolling through cookie decorating videos, when it hit me—graduation caps made of sugar and icing. The next morning, I had butter warming on the counter and a plan. These cookies became the unexpected stars of her party, with guests genuinely amazed that something so elegant came from my small apartment kitchen.
I'll never forget watching my mom carefully pipe the tiny yellow tassels while my nephew guessed which cookies were real graduation caps. There's something magical about feeding people food you made with your hands, especially when it celebrates their biggest moments. Those cookies disappeared in minutes, but the photos lasted forever.
Ingredients
- All-purpose flour (2 1/2 cups): The structure of everything—sift it if your flour has been sitting in humid air, because lumps will sabotage your beautiful dough.
- Unsalted butter (3/4 cup, softened): This is non-negotiable; cold butter won't cream properly, so leave it out for an hour before starting.
- Granulated sugar (1 cup): Don't skip the creaming step even though you're tempted—fluffy butter and sugar is what gives these cookies their tender crumb.
- Egg (1 large): Room temperature works best, though honestly I've thrown cold ones in and the cookies turned out fine anyway.
- Vanilla extract (2 teaspoons for dough, 1/2 teaspoon for icing): Pure vanilla tastes noticeably better than imitation, and people can taste the difference in something this simple.
- Powdered sugar (3 cups, sifted): Sifting matters here because lumpy icing won't pipe smoothly, and smooth icing is half the visual appeal.
- Egg whites or meringue powder (2 large egg whites or 4 tablespoons meringue powder plus 6 tablespoons water): Raw egg whites make the silkiest icing, but meringue powder is safer if you're concerned about food safety.
- Gel food coloring in black and yellow: Gel holds color better than liquid food coloring, which would make your icing too wet and runny.
- Mini M&Ms or candy pearls: These tiny candies become the tassels, and yellow ones look perfect, though any color works if you're making themed cookies.
Tired of Takeout? 🥡
Get 10 meals you can make faster than delivery arrives. Seriously.
One email. No spam. Unsubscribe anytime.
Instructions
- Mix your dry ingredients:
- Whisk flour, baking powder, and salt in a bowl until evenly combined—this prevents lumps and distributes the leavening evenly. Set aside while you work on the butter.
- Cream butter and sugar until fluffy:
- Beat them together for two to three minutes until the mixture looks pale and almost whipped, which incorporates air and makes cookies tender. You'll hear the mixer slow slightly when everything is properly aerated.
- Add egg and vanilla:
- Mix just until combined, scraping down the bowl so nothing hides at the bottom. The dough should look smooth and slightly shiny at this point.
- Fold in flour gradually:
- Add the dry mixture in two or three additions, mixing on low speed until dough just comes together. Overmixing here toughens the cookies, so stop as soon as you don't see streaks of flour.
- Chill the dough:
- Divide into two disks, wrap in plastic wrap, and refrigerate for at least thirty minutes—cold dough is easier to roll and cut cleanly. I usually chill while preheating the oven so nothing takes extra time.
- Roll and cut:
- On a lightly floured surface, roll dough to about one-quarter inch thickness, then cut with your graduation cap or square cutter. If dough warms and becomes sticky, refrigerate it again for five minutes.
- Bake with intention:
- Place on parchment paper and bake at three hundred fifty degrees for eight to ten minutes until edges are just barely golden—remove them early because they continue cooking slightly as they cool. They should still feel soft in the center when you take them out; they firm up as they cool.
- Beat egg whites for icing:
- Whip them on medium-high speed until foamy, which takes about two minutes and signals they're ready for sugar. Overbeaten egg whites get grainy, so watch for stiff, glossy peaks rather than dry, separated peaks.
- Add powdered sugar gradually:
- Pour it in slowly while mixing—dumping it all at once creates clouds of sugar everywhere. Beat for about five minutes until the mixture looks smooth and thick.
- Divide and color your icing:
- Set aside a small portion for yellow before tinting most of it black with gel coloring—gel is concentrated, so start with tiny amounts. Mix colors on low speed so you don't splash icing everywhere.
- Adjust consistency for decorating:
- Thinner icing floods cookies smoothly, while thicker icing pipes clean lines; add water by the teaspoon for flooding and powdered sugar for piping. Think of it like painting—one consistency is for filling, one is for details.
- Outline and flood the cookies:
- Pipe a thin black line around each cookie's edge, then fill the center with slightly thinner black icing, using a toothpick to spread it evenly to corners. This takes patience, but once you get into a rhythm, it becomes almost meditative.
- Pipe yellow details:
- Wait thirty to sixty minutes for the black icing to set, then pipe a small yellow tassel and button on each cap using thicker yellow icing. The toothpick is your friend here for nudging details into place.
- Add the candy pearl:
- Place a mini M&M or candy pearl at the end of each tassel before the yellow icing fully sets so it sticks. Let everything dry for several hours or overnight before serving or packaging.
 Save
Save There's a quiet joy in watching someone unwrap a cookie box and smile before they even taste anything. These little graduation caps started as an idea born from wanting to celebrate someone I loved, and they turned into something that made the moment feel special in a way store-bought treats never could.
Timing and Planning Your Decorating
The beauty of these cookies is that they don't have to happen all at once. I bake the dough one evening, refrigerate it overnight, and bake the cookies the next morning—they keep perfectly in an airtight container for two days. Then I decorate them the day of or the day before the celebration, which takes the pressure off and lets you work slowly without rushing.
Natural Alternatives and Substitutions
If you want to avoid gel food coloring, you can use natural alternatives like activated charcoal for black and turmeric or beet juice for color, though the results look slightly different and sometimes taste earthy. For royal icing, meringue powder is safer than raw egg whites if that's a concern in your kitchen, and the texture ends up nearly identical once everything is mixed.
Storage, Gifting, and Celebrating
These cookies keep beautifully in an airtight container for up to five days, and they actually taste better the next day as flavors deepen. If you're gifting them, stack them between parchment paper, layer them carefully in a box, and deliver within a day or two before the icing absorbs moisture and softens.
- Store decorated cookies in a cool, dry place away from humidity, or they'll start to soften as the icing absorbs moisture from the air.
- These are perfect for graduation parties, teacher gifts, or even class celebrations, and people genuinely think you hired a bakery.
- Make extra—they disappear faster than anything else on the dessert table, and everyone wants to take them home.
 Save
Save These graduation cap cookies became more than a recipe for me—they're the thing I make when someone I care about is stepping into their next chapter. They remind me that celebrating people doesn't have to be complicated, just thoughtful and made with your own hands.
Recipe FAQ
- → What is the best flour to use for the cookies?
All-purpose flour works best, providing a sturdy yet tender texture ideal for cutting shapes and holding details.
- → How do I achieve smooth royal icing for decorating?
Beat egg whites or meringue powder with powdered sugar until glossy peaks form, then adjust consistency with small amounts of water for flooding or piping.
- → Can I prepare the cookies ahead of time?
Yes, the cookies can be baked up to two days in advance and decorated the next day for optimal freshness and ease.
- → How should the decorated cookies be stored?
Store fully dried cookies in an airtight container at room temperature to keep them crisp and fresh.
- → What alternatives exist for food coloring?
Natural colorings such as beet juice or turmeric powder can be used as alternatives to gel colors for a more natural tint.