 Save
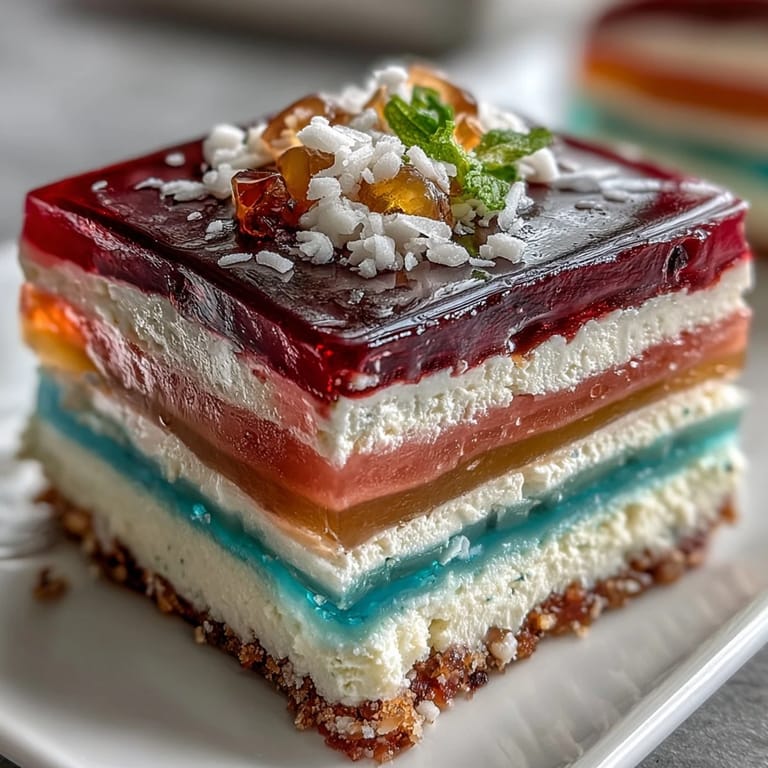
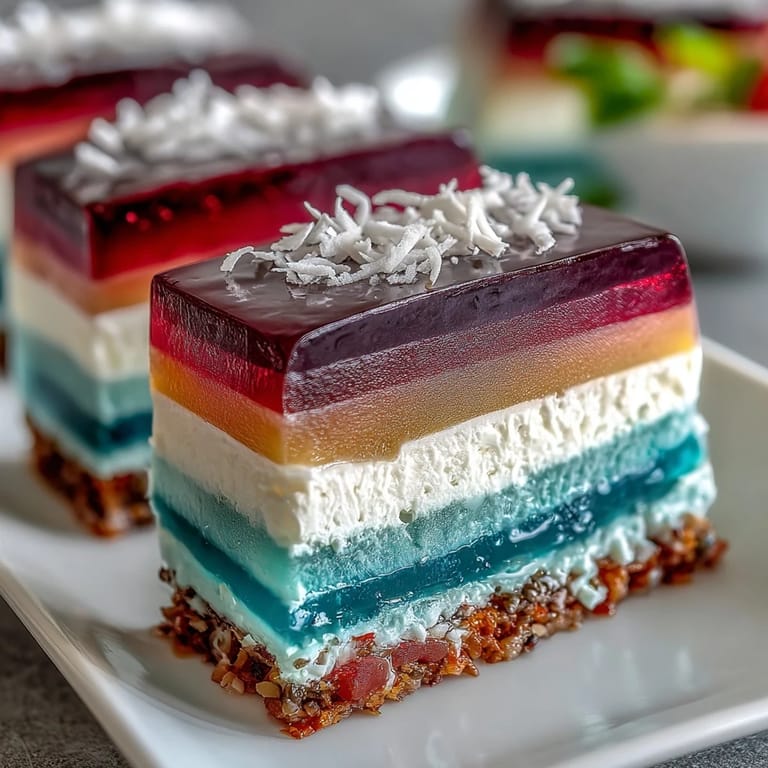
Save This Agar-Agar Rainbow Jelly Cake with Coconut Cream stole the show at my cousin's birthday last summer. It was a hot day, and the vibrant, shimmering layers caught everyone’s eye, evoking childhood memories of playing with colors in the sun. As I crafted each colorful jelly layer, laughter filled the kitchen, bits of fruit juice splattered here and there, adding to the cheerful chaos. There's something magical about watching simple ingredients transform into a whimsical dessert, and the excited whispers of 'Can I help?' made the process even sweeter. It’s a dessert that brings joy not just in taste, but in the creation itself.
Ingredients
- 2 liters of water: This is the base of your jelly, so use fresh, cold water for the best results.
- 16 g agar-agar powder: This ensures your jelly sets perfectly; it’s a vegan gel alternative that gives a delightful texture.
- 400 g granulated sugar: Sweetness is key here, balancing the flavors of the fruit juices.
- 1/2 teaspoon vanilla extract: A hint of vanilla rounds out the flavor beautifully.
- Gel food coloring: Choose vibrant colors for a playful look—gel is essential for deep, rich hues.
- 1/2 cup fruit juice per color: This step adds natural fruit flavors, making each layer a unique experience.
- 400 ml full-fat coconut milk: Creaminess comes from this ingredient; it plays nicely with the fruity layers.
- 4 g agar-agar powder for coconut cream: Essential for setting this rich layer.
- 40 g granulated sugar for coconut cream: Sweetens the creamy layer to perfection.
- Pinch of salt: Enhances the flavors of the coconut cream.
Instructions
Tired of Takeout? 🥡
Get 10 meals you can make faster than delivery arrives. Seriously.
One email. No spam. Unsubscribe anytime.
- Prepare the Jelly Base:
- Combine the water and agar-agar powder in a large saucepan, bringing it to a boil while stirring—it’s mesmerizing to watch the powder dissolve. Once combined, stir in the sugar until it disappears into the mix.
- Divide and Color Jelly:
- Pour the agar-agar solution into bowls, adding your food coloring—don’t be shy! Each bowl should look more stunning than the last.
- Assemble Layers:
- Gently pour your first color into the prepared pan and refrigerate until set; the anticipation builds as you repeat with each color. Let your inner artist shine as you layer those hues.
- Prepare the Coconut Cream:
- In a clean saucepan, mix the coconut milk, additional agar-agar, sugar, and salt before heating; the rich aroma is heavenly as it simmers. This cream layer is where the magic happens!
- Top with Coconut Cream:
- Let the coconut mixture cool a bit before pouring it atop your colorful layers, sealing the deal for this stunning dessert. Patience is key here; allow it to chill completely.
- Serve:
- Carefully release the jelly cake by loosening the edges with a knife, then flip it onto a plate—it’s a moment of triumph! Slice and enjoy while the joy of creation still hangs in the air.
 Save
Save Every time we slice into this cake, it reminds me that cooking is about the connections we create. Sitting around the table, reminiscing and laughing while enjoying this colorful treat makes all the effort worthwhile.
A Splash of Creativity
Don't hesitate to play with the flavors by using different fruit juices or adding diced fruits between layers. The beauty of this dessert is its versatility, allowing you to customize it for every occasion, letting your imagination run wild in the kitchen.
Textures and Layers
Consider adding different textures by incorporating crushed nuts, or maybe a layer of fruit puree—each idea adds a delightful surprise when served. The crunch of nuts with the jiggle of jelly makes every bite an experience.
Final Thoughts and Reminders
Remember to trust your instincts when crafting this jelly cake; it’s all about having fun and enjoying the moment. Your creativity will shine through, and you might just start a new tradition.
- Consider ambient conditions; warmer kitchens might set jelly faster.
- Adjust sweetness according to your taste; you can always add more fruit juice.
- Enjoy it chilled for the best flavor and texture contrast.
 Save
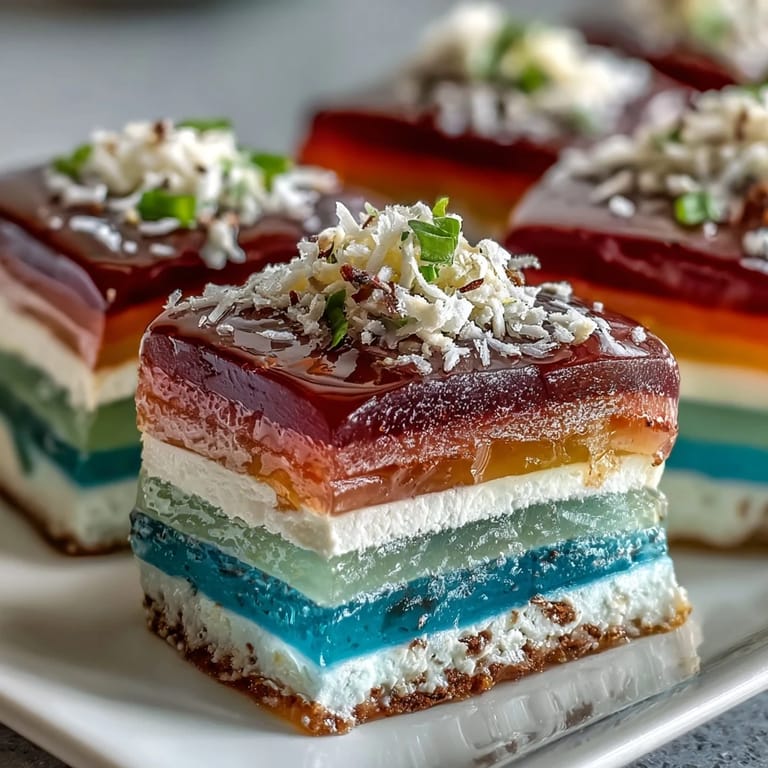
Save This vibrant cake is sure to brighten any gathering, reminding us that cooking is about joy, creativity, and connection. Embrace the colors, flavors, and smiles this dessert brings!
Recipe FAQ
- → How do I ensure vivid colors in my jelly?
To achieve the strongest colors, use gel food colorings instead of liquid ones, as they provide more intense shades.
- → Can I substitute the coconut milk?
Yes, you can use any plant-based milk in place of coconut milk, but be sure to adjust the sweetness as needed.
- → How long should I refrigerate the layers?
Each colored jelly layer should set in the refrigerator for about 10-12 minutes or until just firm before adding the next layer.
- → What fruits work well between layers?
Diced tropical fruits like mango, kiwi, or berries can add flavor and texture between the jelly layers for an extra treat.
- → Is this dessert suitable for special diets?
Absolutely! This dessert is both vegan and gluten-free, making it perfect for a variety of dietary needs.